Design | Hierarchy
One of the most important aspects of a well-engineered emulator, especially for a multi-system emulator, is a solid design hierarchy to keep track of the overall system state: that is to say, expressing a system’s capabilities, its settings that can be changed, which external peripherals can be connected to it (cartridges, floppy disks, controllers, etc), and so forth.
While going in blindly can definitely result in a working emulator, it pays to come up with a solid foundation to build your emulator upon, rather than having to adapt a large codebase to a better design later on.
With a good hierarchy, you can abstract the emulation core from the graphical user interface, which has many benefits: not only can you now offer multiple backends (say for different operating systems), your core emulation code will remain cleaner, better abstracted, and more portable in the future once you’ve retired from emulator development. You can easily emulate more systems, and they will plug right into your existing user interface.
Aside from hard-coding these details, there are two major ways to structure the emulator hierarchy: lists and trees.
Background
The primary reason we need a hierarchy is because system states are not static. One might describe the Super Nintendo as having a cartridge port, an expansion port, and two cartridge ports. But then take the Sufami Turbo adapter:
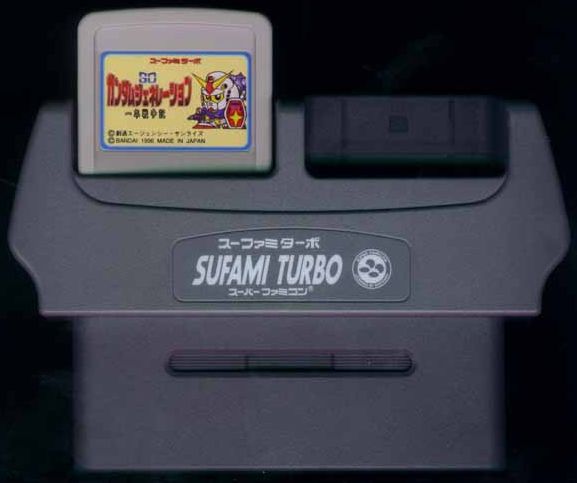
The Sufami Turbo is a device released by Bandai which allows playing smaller Sufami Turbo games that were less expensive to produce. It also had a unique hook to it: your friends could plug their games in next to yours, and the two games would combine to create an even bigger game!
For instance, combining SD Ultraman games would add fighters from each game into one game. Combining two copies of Poi Poi Ninja World would allow collaborative play with each player’s saved character data.
If a user were to choose to connect this cartridge to the SNES’ cartridge port, an interesting thing happens: the system hierarchy has now expanded with two additional Sufami Turbo cartridge ports.
Another example which is perhaps a bit more familiar, the Super Multitap:
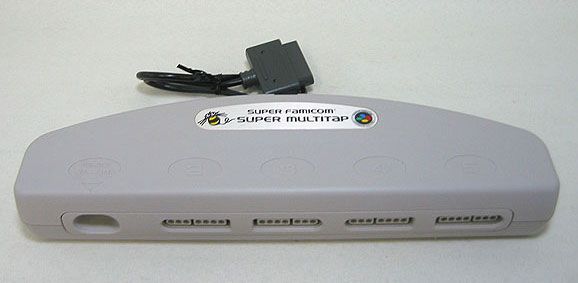
By plugging this device into a controller port, the system hierarchy is expanded with an additional four controller ports, which accept any kind of controller. Of course, only certain controllers were compatible, you couldn’t daisy-chain Multitaps to create 16-player games, for instance. But it did support more than just standard gamepads.
Hard-coding
The naive approach taken by most standalone, single-system emulators, is to hard-code everything into their user interfaces for the specific system they’re working on.
So for instance, one might be tempted to write an SNES emulator with the traditional “Load Cartridge” menu option, and then simply adding another for “Load Sufami Turbo Cartridge”. And then another for the Super Game Boy which also exposes another cartridge slot. And then another for the BS-X Satellaview base cartridge which also does the same. And then another for the ten SNES games that use BS-X slots as expansion data for games, such as Same Game and SD Gundam GX.
And then for the Super Multitap, treating it as if it’s a controller that has four standard gamepads connected to it at all times.
But not only is this very limiting (what if you wanted to connect Twin Taps or some other controller to the Super Multitap?), it’s also not abstracted: the user interface is bound tightly to the Super Nintendo, and cannot be used to emulate a Game Boy Advance, which doesn’t have any of these things.
There is no doubt however that if you’re absolutely certain you only ever want to write a single emulator, this can produce an extremely friendly user interface without a lot of work.
Lists
A simple improvement would be to express the system hierarchy as a series of lists: one for cartridge ports, one for controller ports, one for settings, etc. For the Super Nintendo, that would look something like this:
- • Cartridge Port
- • Expansion Port
- • Controller Port 1
- • Controller Port 2
You might expose this in an API like so:
					struct Object { string name; ... };
struct Controller : Object { vector<string> buttons; ... };
struct Setting : Object { vector<string> availableValues; ... };

struct CartridgePort : Object { string fileExtension; ... };
struct ControllerPort : Object { ... };

struct Emulator : Object {
  vector<CartridgePort> cartridgePorts;
  vector<ControllerPort> controllerPorts;
  vector<Controller> availableControllers;
  vector<Setting> settings;
};
struct SuperNintendo : Emulator { ... };

SuperNintendo::SuperNintendo() {
  cartridgePorts.append({...});
  controllerPorts.append({"Controller Port 1", ...});
  controllerPorts.append({"Controller Port 2", ...});
  availableControllers.append({"Gamepad", ...});
  availableControllers.append({"Super Multitap", ...});
  settings.append({"CPU Revision", {"1", "2"}});
}
You could now construct a user interface that builds itself based on an Emulator object that was passed to it by iterating over its internal lists: create menu item entries for loading games into each exposed cartridge port (the SNES has only one, but the MSX and Nintendo DS both have two.) Create menu groups for each controller port (if any; the Nintendo DS would not have any), and populate them with one of each controller type from the available controllers list, and so forth.
When a Sufami Turbo cartridge is loaded into the cartridge port, the emulation core would then add two more items to the cartridge ports list for each Sufami Turbo cartridge slot. The user interface would then need to rescan the Emulator object and repopulate itself to expose the two new menu options to load games into the two Sufami Turbo slots. Likewise, when unloading the game, these two cartridge ports would disappear, and the user interface would remove them from the game loading menu.
A similar situation could occur for the Super Multitap by adding more controller ports to the list.
While this works, the problem is that there is no direct hierarchy here: it is not clear at all that the Sufami Turbo slots are descendents of the base Super Nintendo cartridge that’s currently connected, or that the extra controller port slots are descendents of the Super Multitap.
It can also get rather messy: we didn’t expose the expansion port above. What is an expansion port? It depends on the system. It could be a CD-ROM drive as with the Sega CD. It could be a third controller for the Sega Genesis. The same port might be used for both hardware expansions and games as with the MSX. It could even be an exercise bike (seriously) as with the Exertainment Bike for the Super Nintendo.

Trees
The right way to express a complete hierarchy would be with a tree. Instead of hard-coded lists of each type of object you may need, you start with a tree root that represents the system you are emulating, and express every cartridge port, expansion port, controller port, adjustable setting, video output, audio output, and so forth as branches of the tree. These branches can grow to contain their own branches, or terminate as leaves of the tree. For the Super Nintendo, this tree might look something like this:
- • Super Nintendo
- Cartridge Port => Sufami Turbo
- Sufami Turbo Port – A
- Sufami Turbo Port – B
- Expansion Port
- Controller Port 1 => Gamepad
- Controller Port 2 => Super Multitap
- Super Multitap Port – A => Twin Tap
- Super Multitap Port – B => Twin Tap
- Super Multitap Port – C
- Super Multitap Port – D
- CPU
- Revision => 2
So in the above example, you can see how the tree expands when the Sufami Turbo and Super Multitap are connected to the system.
The internal structure for a tree might look something like this:
					struct Object { string name; vector<shared_ptr<Object>> children; ... };
struct SuperNintendo : Object { ... };

struct Peripheral : Object { string type; ... };
struct Cartridge : Peripheral { ... };
struct Expansion : Peripheral { ... };
struct Controller : Peripheral { ... };
Whenever a newly emulated system needs a new type of object, it can be added in. The user interface will also need to be extended to support the new object type, but all existing code continues to work.
Abstraction
You may have already caught this, but in order to have a tree, every node has to be of the same type. That is to say, everything inherits from Object. Whereas with the list example, we did this only for the convenience, for the tree it is necessary.
What’s not necessary, but useful, is that I’ve made the child objects reference-counted through the use of shared_ptr. This allows the user interface to hold copies of tree elements without fearing dangling pointers. Although that can be a dangerous thing if not used carefully, it simplifies the user interface design by letting you skip iterating over the entire tree constantly. This one’s up to you.
You can of course implement a list-based design with this type of object abstraction like so:
					struct Object { string name; ... };
struct Emulator : Object { vector<Object> objects; ... };
struct SuperNintendo : Emulator { ... };
But at this point, there’s really no reason not to use the tree-style instead in order to express descendants. The reason to have multiple lists for each type of cartridge port, controller port, controller, etc is that it provides a sort of middle-ground between hard-coding everything, and requiring a 100% fully-abstracted design.
But the problem with the middle-ground list hierarchy as I’ve described is that while it will work for a few systems, it begins to crumble under its own weight as you begin to emulate more and more additional systems. It is at least more resilient than a hard-coded design that would only ever work for a single system. But I do feel that in the end, it’s not a solid foundation.
History
Note: this is the part of the article that transitions from general advice to a history lesson. You’ve been warned ^-^;
All three above hierarchies come from my own personal experience writing emulators for the past 15 years.
I originally started bsnes out in 2004 using the hard-coded approach, complete with hard-coded Sufami Turbo and BS-X Satellaview support as described.
After many years, I reached a point where I was severely burning out on user interface design. There was far too many bad foundational design decisions, and I had built the interface atop a popular toolkit that turned out to be very large and horrendously buggy (at least in 2010), which really didn’t help matters.
I initially wanted to hand off user interface development to other developers, and so in order to abstract my emulation core from the user interface, I had to construct an API layer for bsnes.
And with this, I created a list-based design which I called libsnes. libsnes was a list-based design as described above.
Themaister took up the mantle with libsnes and created his own user interface that could speak to libsnes, which he called SSNES.
But having an API that was only designed for the SNES was quite a limitation. I realized this around the same time as I started to work on Super Game Boy emulation, which required a Game Boy emulator as a prerequisite.
Themaister started by porting Snes9X over to libsnes, and then he did something that turned out to be quite fateful: porting other non-SNES emulators to this same API, even though they were different systems.
Our methodologies diverged around this point: Themaister took to expanding libsnes as a C-based API to support more systems, and this API was eventually renamed to libretro, which then powered SSNES, which was renamed Retroarch.
Meanwhile from my end, I scrapped libsnes completely and moved to an object-oriented design in C++, which I called Emulator::Interface, and bsnes, continually expanding with more emulated systems, became higan:
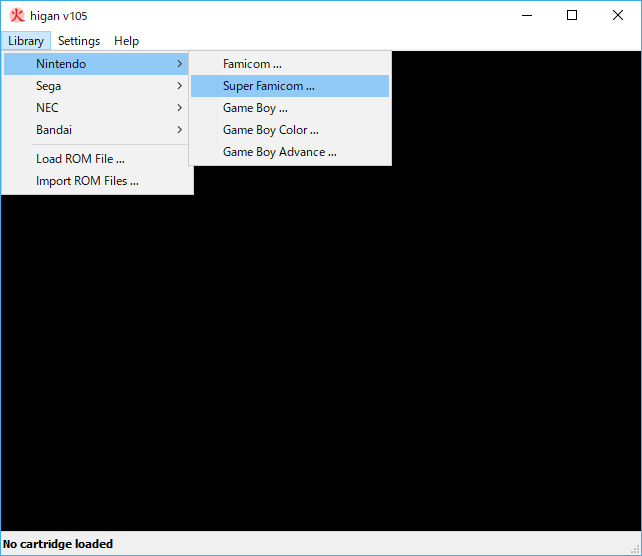
There was nothing fundamentally different between libretro and Emulator::Interface, and for a time there existed a translation layer between the two. The reason for our split came down to me wanting to maintain my own set of emulators, and Themaister wanting to incorporate emulators from multiple projects.
higan continued to expand more and more under Emulator::Interface, until I made the fateful mistake of attempting to emulate the MSX:
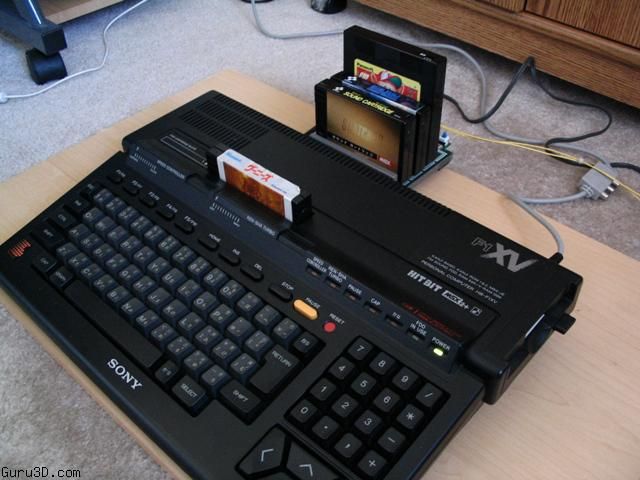
A seemingly simple Z80-based computer from the ’80s, it turned out to be the harbinger of change for higan.
The MSX was one of Japan’s many takes on a generalized personal computer, made by many manufacturers. And each manufacturer extended this system in fantastic and myriad ways as unique selling points.
My list-based design never conceived of a system with more than one game slot. Yet here was this MSX which could have any number of cartridge ports, floppy disk drives, Quick disk drives, and even cassette tape readers!
In the above image, you see a system with two cartridge ports and a floppy disk drive on the side. Out of the back expansion port, an adapter allowing three additional cartridges is connected. Heck.
Meanwhile, my other cores were starting to show their limitations: to support the Sufami Turbo, BS-X Satellaview, and Super Game Boy, I came up with a crude daisy-chaining hack: load the base cartridge, and the emulation core would request the user interface to load the slotted cartridge (or two for the Sufami Turbo.) I didn’t conceive of a system that might add additional cartridge ports, and so I hard-coded the Super Multitap as a series of four gamepads, which prevented me from emulating Twin Taps.
And then Micro Machines 2 for the Sega Genesis came along and ruined my day: this game did away with trying to sell you a multitap adapter, and instead put the extra ports right on the cartridge itself.
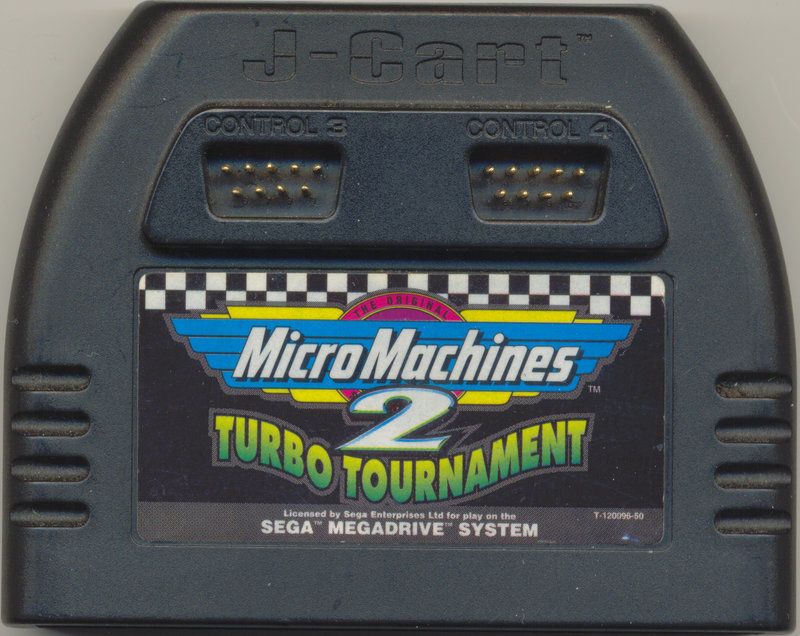
Whelp.
All the way until higan v106, I kept trying to work around the limitations of a list-based design, but eventually it was clear I needed a new design that could scale to handle all of these zany systems and peripherals.
The thing is, neither libsnes nor Emulator::Interface were true manifestations of the list-based design I’ve described in this article: there was never any concept of the lists changing: the Genesis had one cartridge port, one expansion port, one extension port, and two controller ports. The user interface couldn’t adapt to a game cartridge adding more controller ports to the overall system.
I described the above list-based system as one that could potentially handle cases like Micro Machines 2, but after spending many months contemplating how best to handle every case imaginable, my answer was the tree-based design, which I’ve implemented into higan v107 and above. If things were going to be dynamic, it felt like it may as well be expressed as a tree instead of as a list, so it would be clear that controller ports 3 and 4 came from the cartridge.
Having a user interface like higan v106 with a menu that listed each controller port would not be able to convey this hierarchy either, and so a new user interface designed around this tree-view was also needed.
The addition of several new emulation cores and especially the new tree-based design ended up taking me over two years to get from higan v106 to v107. This was the result:
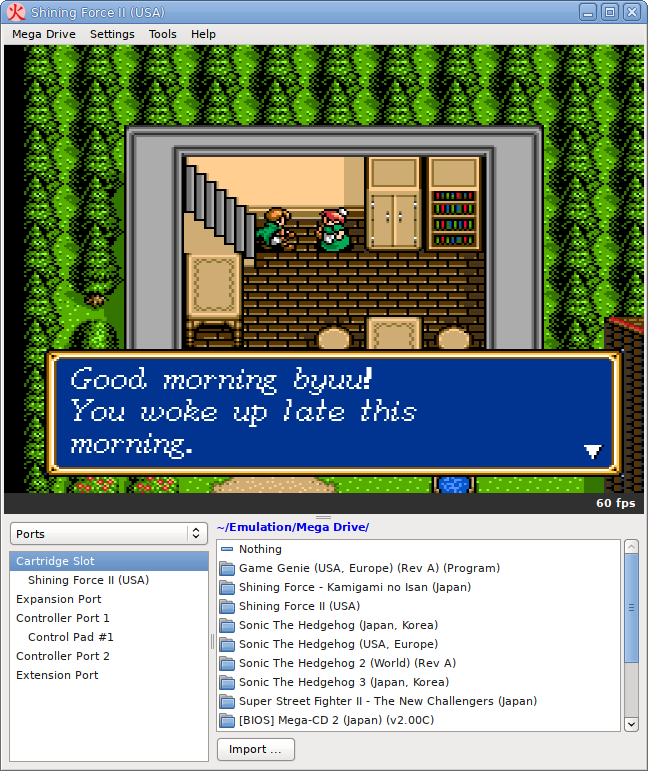
The upside is I can truly express any configuration now, but the downside is that I’m left with a user interface that is very unorthodox and which has a steep learning curve.
I knew this would be the case during early planning, and so I set about to revive bsnes as a standalone SNES emulator that would be designed with a traditional emulator user interface:
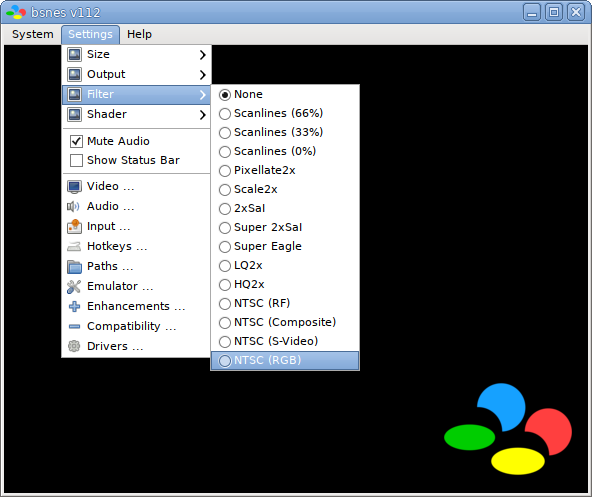
bsnes today is still based on Emulator::Interface, which is a list-based design, but with some hard-coded elements as discussed above with regards to slotted cartridges and multitaps.
Closing
In the end, the design you come up with is up to you. Even if it doesn’t seem like it, I am not making the argument that any one approach is better than the other. Snes9X does exceptionally well being hard-coded, Retroarch is extremely popular with its pseudo list-based approach, and although higan is my personal design of choice, I recognize its limitations in terms of ease-of-use and user familiarity. And so even I use the pseudo list-based approach with bsnes.
With this article, I’m merely sharing what design paradigms I’m aware of and have tried out personally, so you can make your own decision based on what you want to accomplish.
But please put much thought into this before beginning. It is a lot of work to move between hierarchical paradigms in a mature emulator, especially for a multi-system emulator like higan.

